Monorepo in a nutshell
Monorepo is a collection of small projects or packages that can be combined to build a larger project. These small packages can also be independent and don't need to know anything about the other packages.
In this article, we will create a Monorepo project using NPM Workspaces. The project is from my startup Venopi and will have different frameworks and libraries for each application.
Let's get started
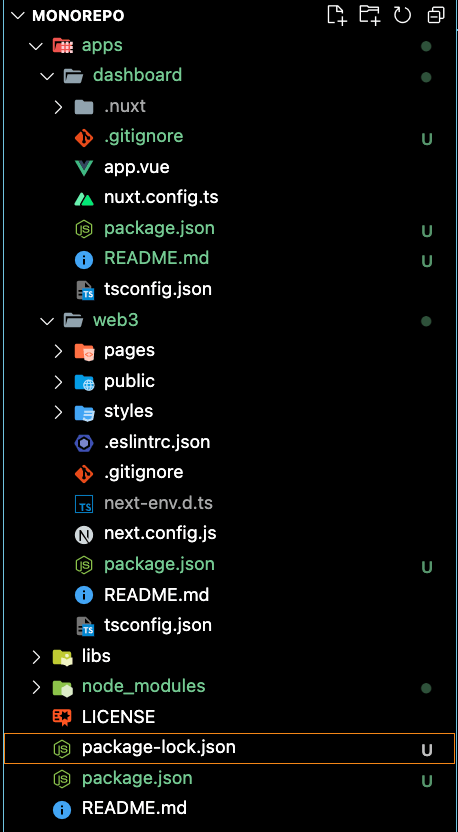
We will build a Monorepo project consisting of two applications and two libraries. Each of the applications uses a different framework and library:
- Dashboard App: Vite (Nuxt + Vue)
- Web3 App: Next.js (React with TypeScript)
For the libraries, we will create TypeScript libraries inside `libs` folder.

Setup
Create your `package.json` file by running:
npm init -yWhen it's done, let's add the `workspaces` to the `package.json` to tell NPM that this project is a Monorepo project and adjust the `package.json` default content to what we want:
{
    "name": "@venopi",
    "version": "1.0.0",
    "description": "Venopi using Monorepo design system",
    "main": "index.js",
    "scripts": {},
    "keywords": [],
    "author": "",
    "license": "ISC",
    "workspaces": [
        "apps/*",
        "libs/*"
    ],
}
TIP: Good convention for naming is `@yourcompany`, so later on, when we have many packages, we can use: `@yourcompany/package-one`, `@yourcompany/package-two`, etc.
Install frameworks for applications into the Monorepo
We will set up our applications to match our project structure by installing Next.js and NuxtJS applications into the Monorepo.
mkdir apps
mkdir libs
01. Dashboard App: Vite (Nuxt + Vue)
Let's create a Vite project with the latest version of Vue:
cd apps
npm create vite@latest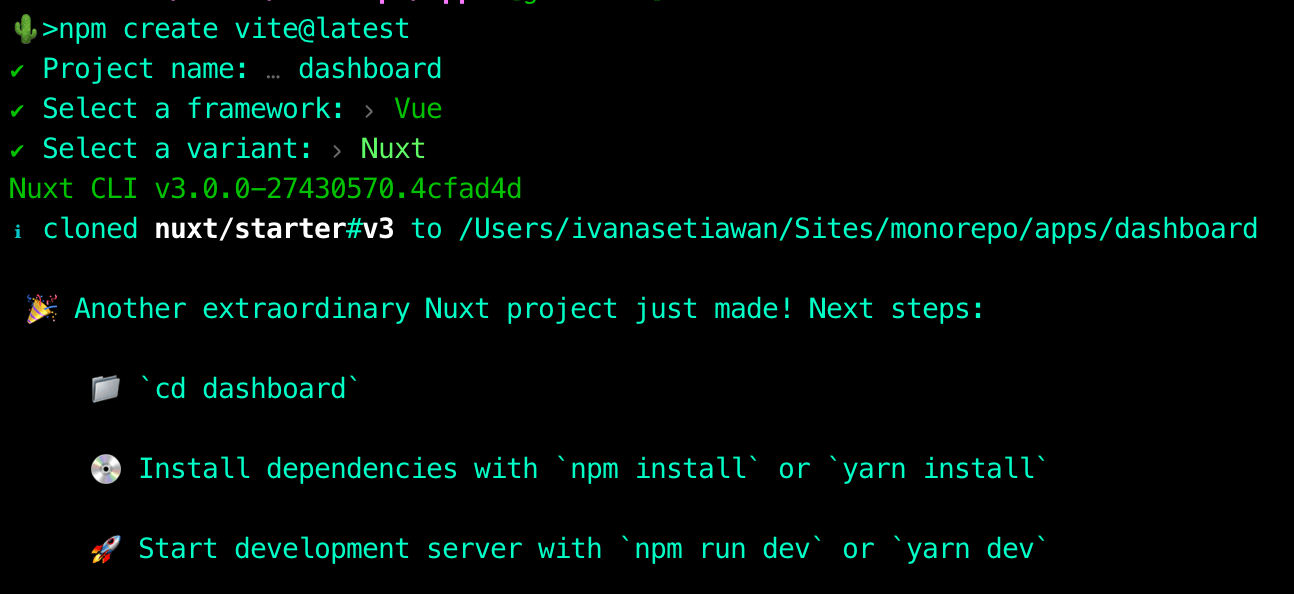
Let's update the name inside `apps/dashboard/package.json`:
{
    "name": "@venopi/dashboard",
}
Awesome, we now have a Dashboard application using NuxtJS + Vue as its framework.
02. Web3 App: Next.js (React with TypeScript)
Let's create a Next.js project with TS inside `apps/web3`.
npx create-next-app apps/web3 --ts --use-npmDon't forget to update the name inside `apps/web3/package.json`:
{
    "name": "@venopi/web3",
}
Splendid, we now have a Web3 application using Next.js as its framework and React as its library with TypeScript syntax.
NPM install
OK, we are all set up, but before we run `npm install`, check your apps/dashboard and apps/web3. They should not have `package-lock.json` inside them. The only `package-lock.json` that exists must only be on the root folder.
Let's go to the root folder and run `npm install`.
When we look at the `package-lock.json` on the root folder, we will see that the `apps/dashboard` and `apps/web3` are inside it.
{
    ...
    "packages": {
        "": {
            "name": "@venopi",
            "version": "1.0.0",
            "license": "ISC",
            "workspaces": [
                "apps/*",
                "libs/*"
            ]
        },
        "apps/dashboard": {
            "name": "@venopi/dashboard",
            "hasInstallScript": true,
            "devDependencies": {
                "nuxt": "3.0.0-rc.12"
            }
        },
        "apps/web3": {
            "version": "0.1.0",
            "dependencies": {
                "next": "12.3.1",
                "react": "18.2.0",
                "react-dom": "18.2.0"
            },
        }
    ...
}Create a TypeScript library using tsup
In this demo, we will create a `utils` TypeScript library. First, let's create a directory called `utils` inside the `libs` folder and then create an empty `package.json` file:
cd libs && mkdir utils && cd utils && npm init -yMake sure to change the name properly:
{
    "name": "@venopi/utils",
}
Then we will install tsup into our package to bundle our TypeScript code.
npm install tsup --save-dev -w=@venopi/utilsNext, we will adjust our `package.json` inside `@venopi/utils`. We create a tsup object with the following:
- Entry point (`entry`)
- Configure it to generate the TypeScript definition (`dts`)
- Generate source map (`sourcemap`)
- Specify the format tsup to output ESM (`esm`) and CommonJS (`cjs`).
Tsup will generate the javascript files inside the `dist` folders. Therefore we need to update the `main` property to `dist/index.js` and add the `module` property to `dist/index.mjs`.
Lastly, we need to adjust the `scripts` accordingly. We want a `dev` script that will watch tsup and a `build` script that will just run tsup. Here is how our final `package.json` inside `@venopi/utils` looks like:
{
    "name": "@venopi/utils",
    "version": "1.0.0",
    "main": "dist/index.js",
    "module": "dist/index.mjs",
    "tsup": {
        "entry": ["src/index.ts"],
        "dts": true,
        "sourcemap": true,
        "format": ["esm", "cjs"]
    },
    "scripts": {
        "dev": "tsup --watch",
        "build": "tsup"
    },
    "devDependencies": {
        "tsup": "^6.3.0"
    }
}
Beautiful. We have a tsup configuration in place! We can create a new TypeScript file (`index.ts`) inside the `libs/utils/src` folder that will export a constant called `cookie`.
export const cookie = '🍪'You are all set! Creating a TypeScript library is easy when you use tsup! To learn more about tsup, go here.
How to run app-specific commands inside a Monorepo project?
Running commands inside an npm monorepo workspaces is straightforward. You must type the `npm run` command with `-w [package name]`. For example, say we want to build `@venopi/utils`. We run:
npm run build -w @venopi/utils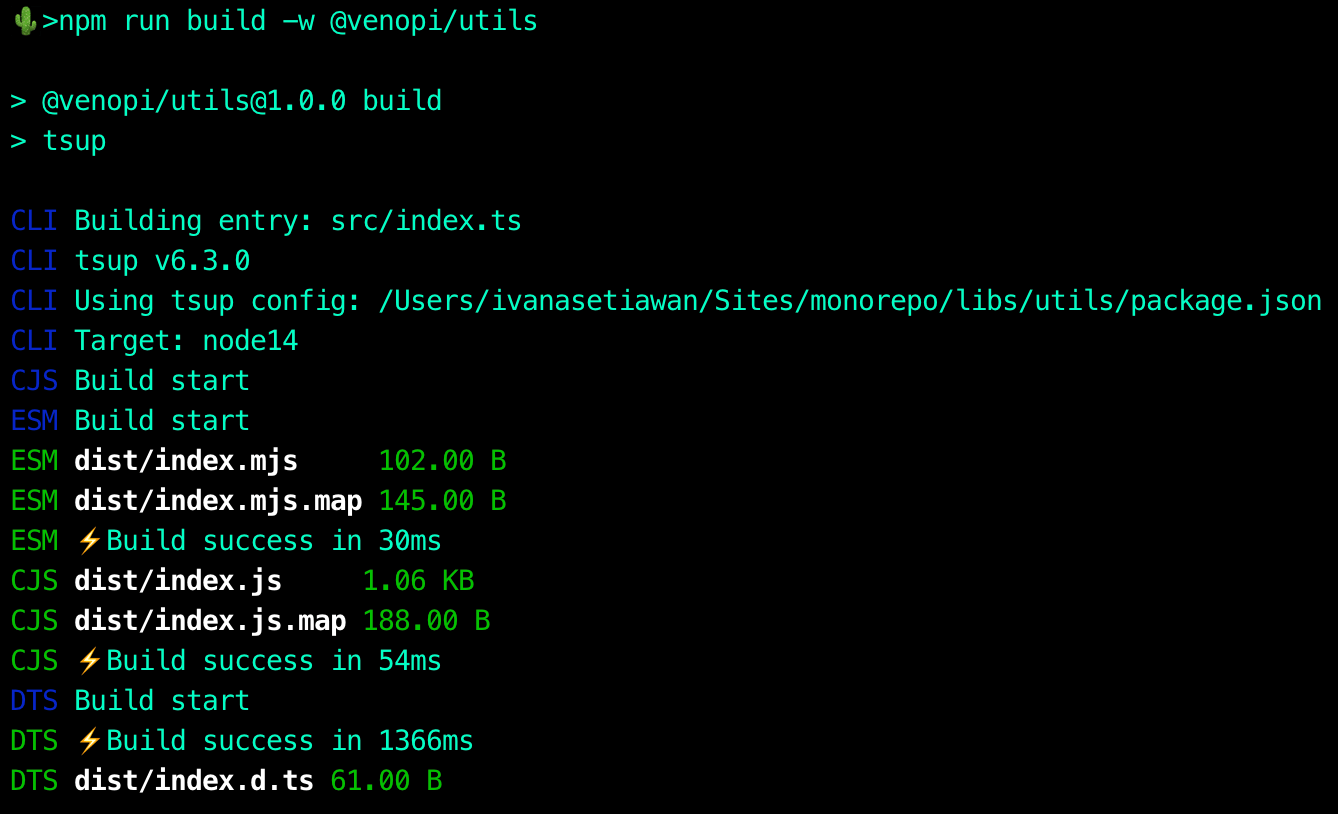
If you want to run all across the packages:
npm run build -wsHow to install dependency for a specific package inside a Monorepo project?
In a real-world scenario, you might want to install different npm packages for different apps:
Is there a way to do this? Yes!
01. `axios` for `@venopi/dashboard` only:
npm install axios -w @venopi/dashboard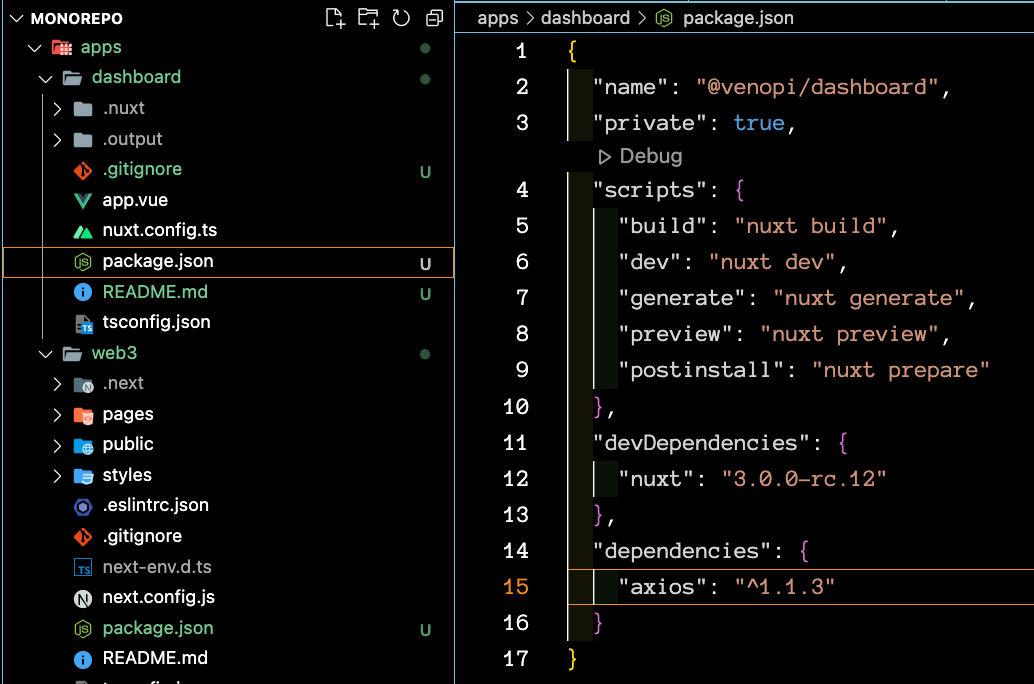
02. `lodash` for all packages:
npm install lodash -ws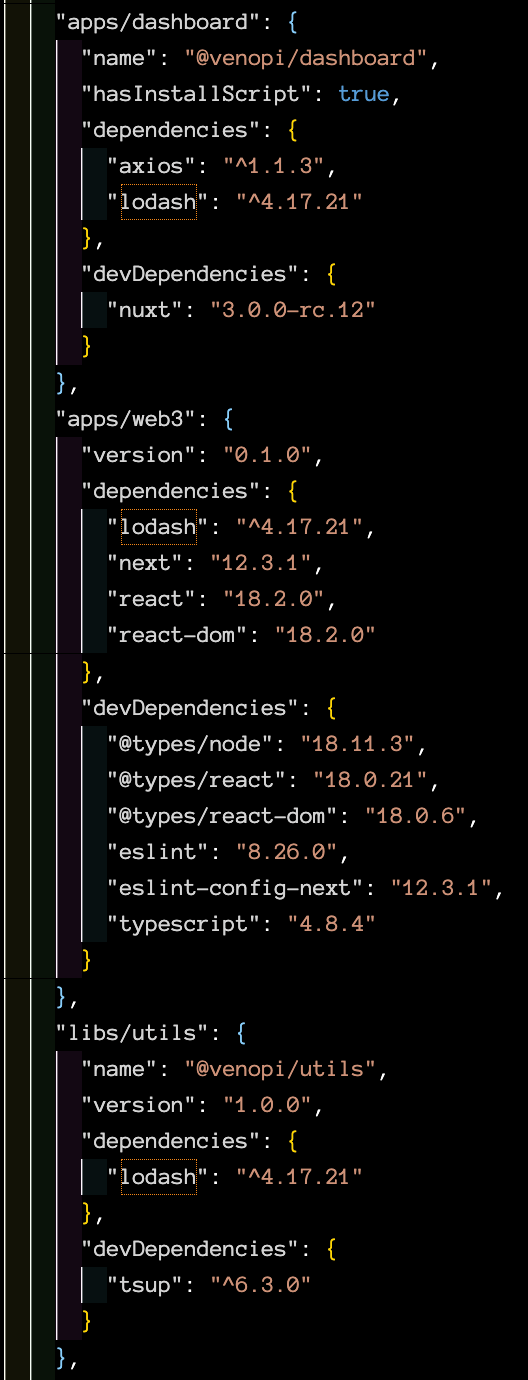
03. `express` in the root of the project:
npm install express -W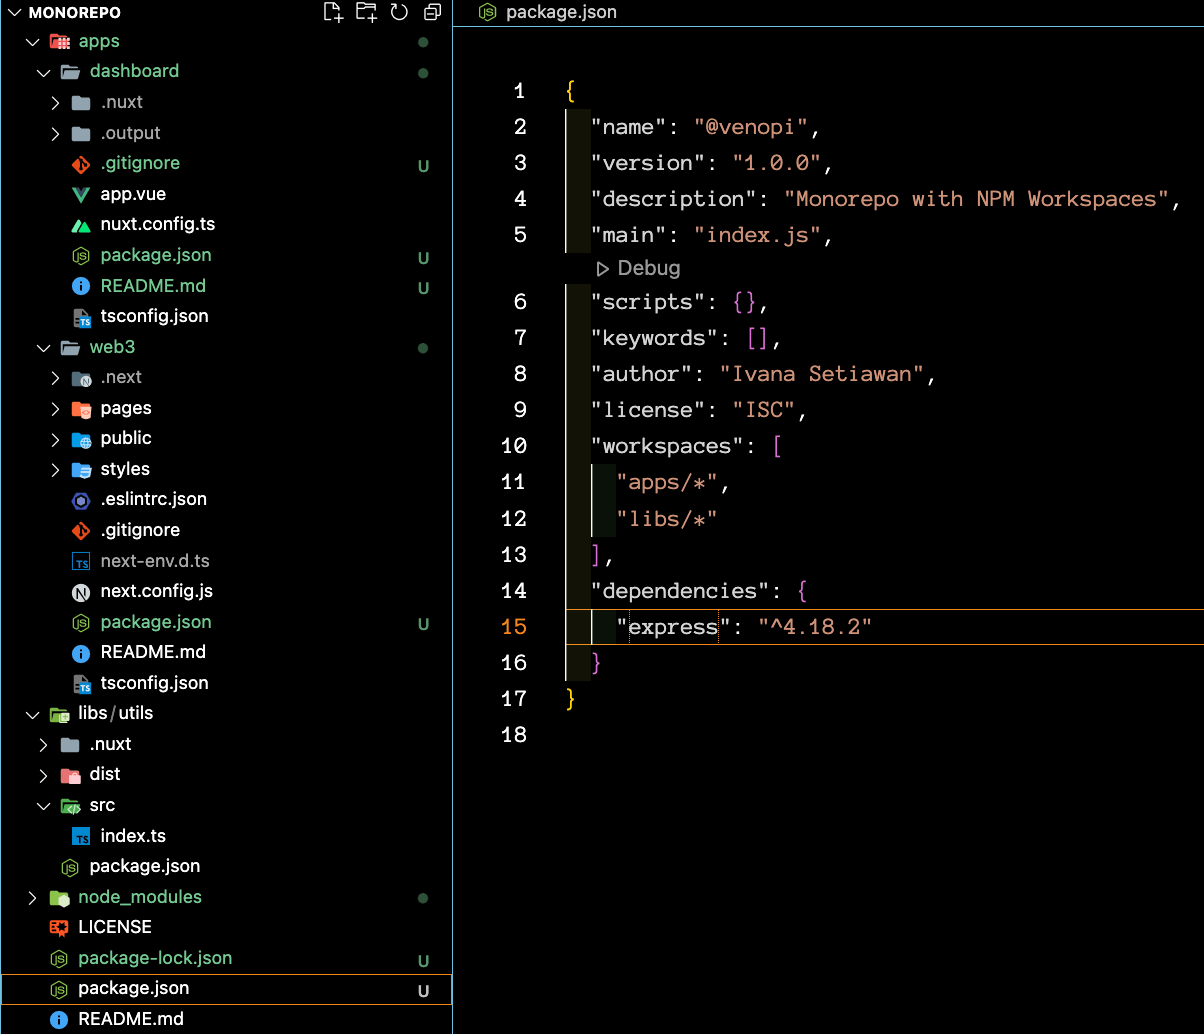
How to run a dev script for all packages simultaneously in a Monorepo project?
We will do this by installing a package called `concurrently`. Concurrently allows you to run multiple commands concurrently 👍 (brilliant name ey!)
To do this, let us install `concurrently` as a dev dependency on the root `package.json` of the project.
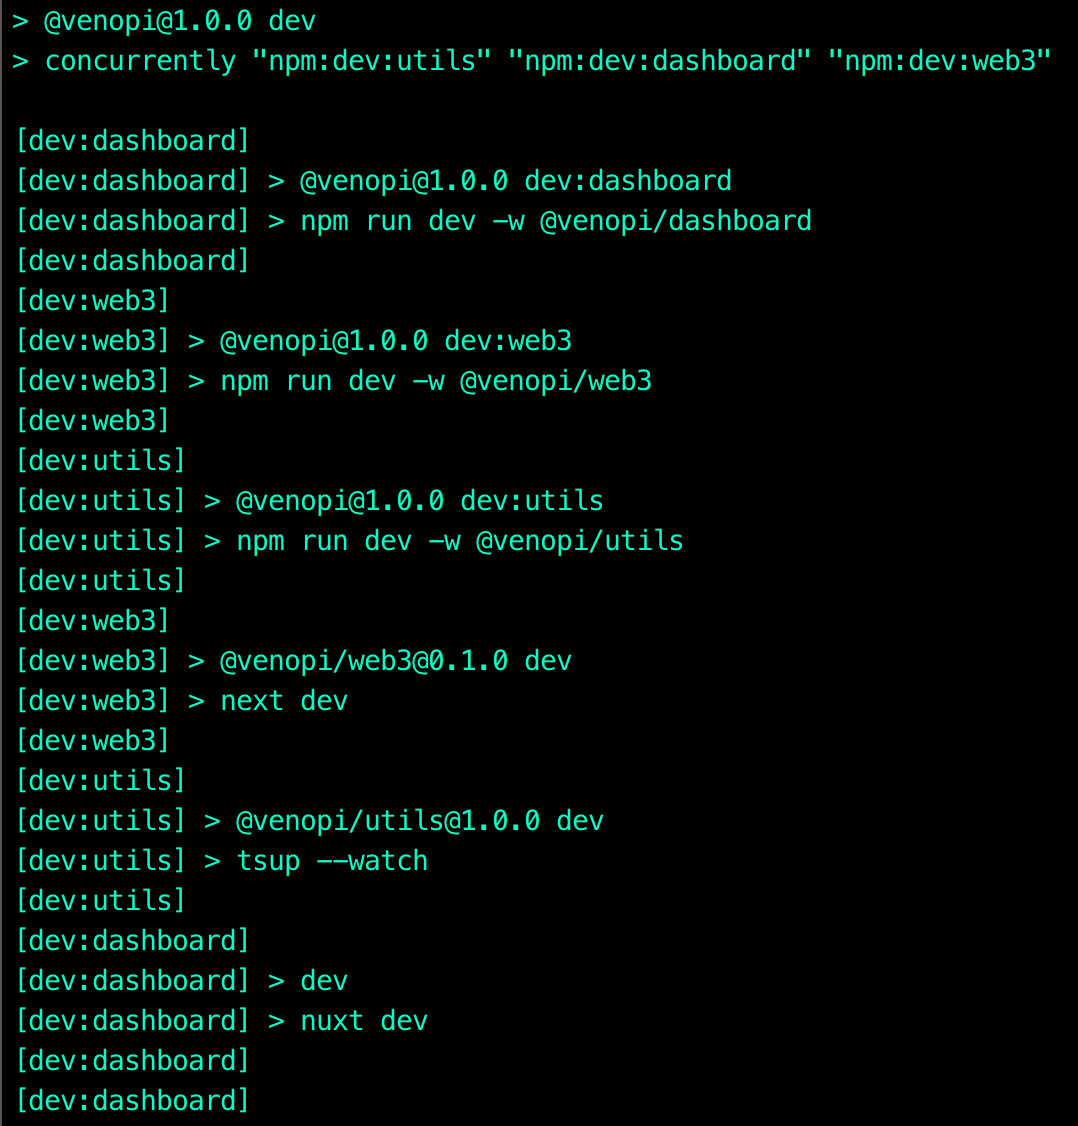
npm install concurrently -W --save-devWhen the installation is done, we will add some scripts inside the `package.json` on the root folder. We need to create `dev:utils`, `dev:dashboard` and `dev:web3` then a generic `dev` using concurrently.
{
"scripts": {
"dev": "concurrently \"npm:dev:utils\" \"npm:dev:dashboard\" \"npm:dev:web3\"",
"dev:utils": "npm run dev -w @venopi/utils",
"dev:dashboard": "npm run dev -w @venopi/dashboard",
"dev:web3": "npm run dev -w @venopi/web3"
},
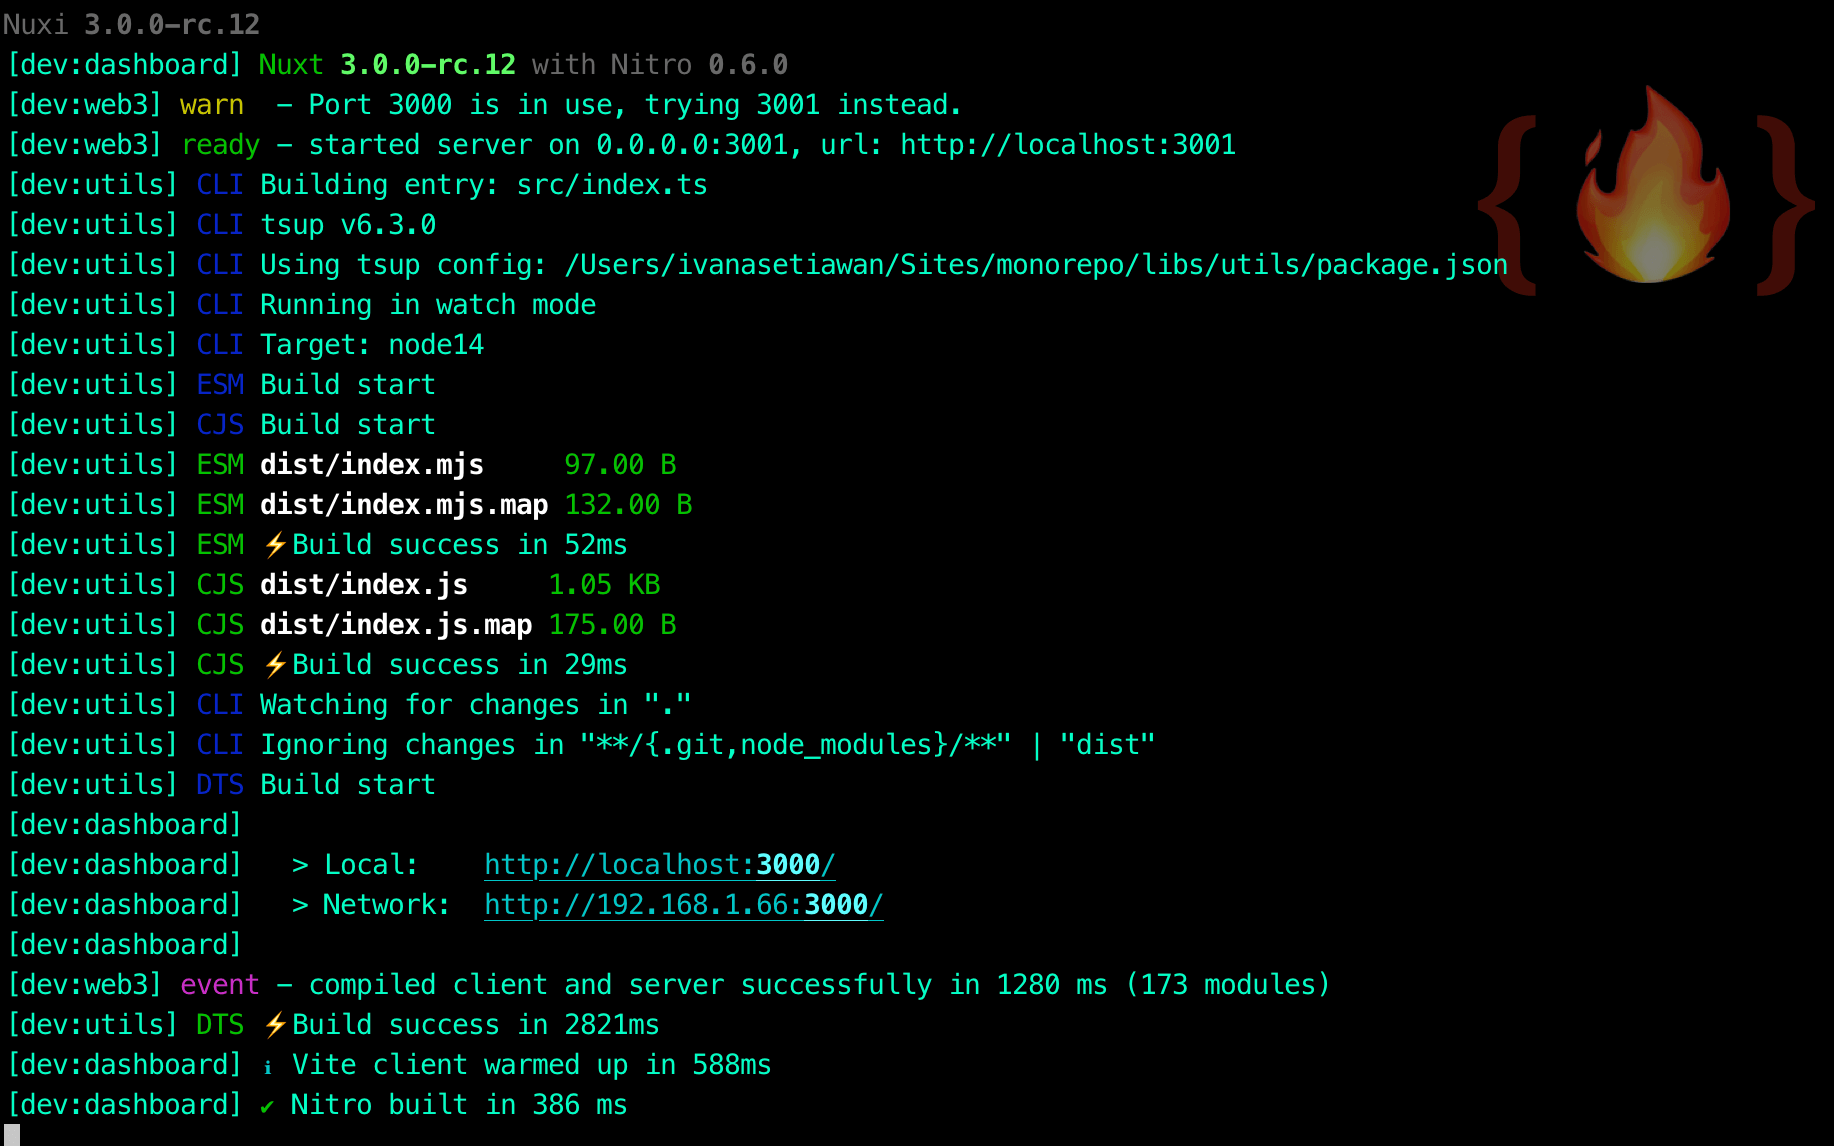
}Now we can run `npm run dev` and see that all our apps run simultaneously.
How to share code between the library and application in a Monorepo project?
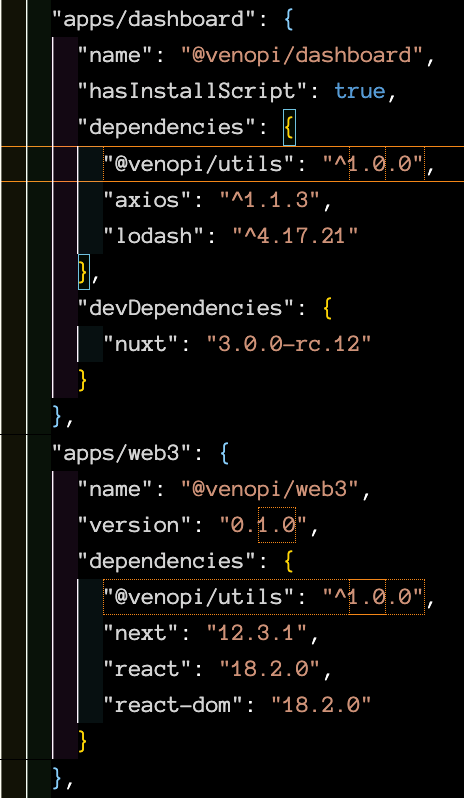
Remember our Cookie library? We want to use that Cookie on both the dashboard and web3 apps. How do we do that?
npm install @venopi/utils --save -w @venopi/dashboard -w @venopi/web3When it's done, we can check if our library is indeed being installed across our packages.
Let us use the cookie lib on both of our apps. I want to show the Cookie on the title of the browser. On the `apps/dashboard`, I adjusted the `nuxt.config.js`:
import { cookie } from '@venopi/utils';

export default defineNuxtConfig({
	app: {
		head: {
			charset: 'utf-16',
			viewport: 'width=500, initial-scale=1',
			title: `Nuxt + Vue  ${cookie}`,
		}
	}
})
On the `apps/web3`, I adjusted the `pages/index.tsx`:
// more code
import { cookie } from '@venopi/utils'

const Home: NextPage = () => {
    return (
        <div className={styles.container}>
            <Head>
                <title>Dashboard Next.js { cookie }</title>
                // more code
            </Head>
        </div>
        // more code
    )
}
If we change the `libs/utils/src/index.ts` from 🍪 to 🍍, we will see the browser titles of Dashboard and Web3 be updated accordingly.
export const cookie = '🍍'
That's it! You just created a Monorepo project with NPM workspaces 👏
You can check out the repo here.
Helpers
- NPM Workspaces
- tsup: Bundle your TypeScript library with no config, powered by esbuild.
- Vite: Next Generation Frontend Tooling
- Next.js: The React Framework for Production
- NuxtJS: The Hybrid Vue Framework